Wednesday, September 28, 2011

Halloween Lovin' and Pumpkin Rigatoni

Following the theme of things that I love created by the last post, it's time to talk Halloween.

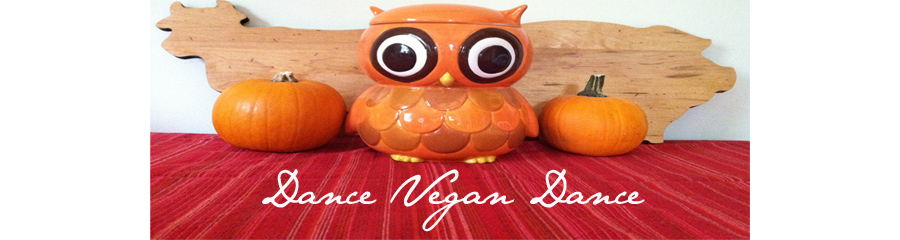
I grew up in a house where Halloween was the be all and end all of holidays - we're talking a Halloween tree (a black spray-painted fake Christmas tree), a 6 foot Frankenstein monster complete with all the appropriate moans and groans, and even a Halloween village. It's been so ingrained in me that the first sign of pumpkins instantly lifts my spirits and the plethora of Yankee Candle Halloween scents sends me into a dizzying spell of bliss.

So it's no surprise that I've decided to continue my family's tradition by buying as much Halloween crap each year as is humanly possible. It's gotten to the point where Seth has decided to limit my spending to "one Halloween item a year, dear" (at least that he knows about). This year he's been particularly generous and I'll admit to buying a lot of the newest Yankee Candle Halloween creations (Have you seen how awesome they are this year? I mean how could I resist!), but he was being rather stingy about when I could put our decorations up and my patience was running out!

Queue the genius idea of a Halloween themed potluck for some of my lovely coworkers - the perfect excuse to have to put up the Halloween decorations earlier than any normal person would ever do AND to get to create fun Halloween themed food! (*stay tuned for a post on the food for this event*)

And thus began the process of taking all of our decorations out of boxes.


I really can't imagine why Seth won't let me get more....

So with pumpkins on the brain, the mood was right to try to veganize a Pumpkin Cream Rigatoni recipe I had seen earlier on pinterest!

**If you don't already know what pinterest is, you need to look into it asap! It's the most addictive website for the crafty and a perfect way to procrastinate any sort of work**

So here it is - adapted from Espresso and Cream

What you will need

8 oz rigatoni pasta
1 tbsp vegan margarine (*I used Earth Balance*)
1/4 cup non dairy milk (*I used unsweetened almond milk to add to the creaminess*)
3/4 tsp salt
1/2 tsp black pepper
1/4 tsp marjoram
1/4 tsp thyme
1 cup canned pumpkin puree (*Unfortunately Seth was sent out to find this and apparently it was "make something with pumpkin" day because 4 stores were sold out. We ended up getting a sugar pumpkin, coring it and scooping out the guts, microwaving that sucker, peeling it, and pureeing it with two burnt fingers in the process. If you can find the canned kind, you are a lucky devil.*)
1 recipe Allison's Gourmet Alfredo
1/4 cup tomato soup
14.5 oz can diced tomatoes with chiles, rinsed and drained
Freshly ground pepper to taste
Nutritional yeast (optional)

How to get it done

Cook the pasta according to the directions on the package, drain and set aside making sure to keep it warm.


Drain and rinse the tomatoes and set aside.


Whip up one batch of Allison's Alfredo. Set aside and keep warm.


Melt the margarine in a large skillet over medium heat.

Add the non dairy milk, marjoram, thyme, and black pepper and stir until mixed. Continue cooking until the mixture is heated throughout, about 2-3 minutes.


Add in the pumpkin puree and 1/3 cup of Allison's Alfredo sauce, stirring until mixed. (*Feel free to add more or less of the alfredo as you see fit depending on how creamy you want the recipe.*)


Stir in the tomato soup and continue cooking for 2-3 more minutes until all the ingredients are heated through.

 Remove from heat and add the diced tomatoes, stirring just until mixed.


Spoon sauce onto pasta, only adding enough to coat the pasta lightly not smother it!


Serve garnished with freshly cracked black pepper and nutritional yeast to taste. Enjoy!


And because we had some homemade pumpkin puree left, we whipped up some pumpkin walnut bread from Hell Yeah It's Vegan.


And because sometimes I love spoiling Seth, I took one of our freshly picked honeycrisp apples and made an apple topping with margarine, brown sugar, and cinnamon that we put over some So Delicious Purely Decadent vanilla ice cream with a graham cracker crumb sprinkle!


Is it October yet?

Sunday, September 25, 2011

The Veganization of the Cheesy Gordita Crunch

I have a confession to make. I love Taco Bell. I mean serious love here. I love it so much that before I went vegetarian I had to check Taco Bell's website to make sure that the beans were, in fact, vegan/vegetarian because the idea of giving up meat was completely fine but the idea of living without Taco Bell? To quote Fezzik from the Princess Bride, "Inconceivable!" Is it the healthiest love? Probably not, but it's a love of the deepest, purest, truest kind.

In the spirit of confession, I'll make another one. Everytime I've slipped in my quest to be vegan it's been under the lure of Taco Bell's infamous Cheesy Gordita Crunch. There's something about the gooey, melted cheese, the crunchy/soft shell combo, and the slight kick of the baja sauce that I can't resist. (And for all you Taco Bell haters out there, one bite of this and you'll be converted - it's heaven in a wrapper)

So with my weakness for this blissful creation in mind, I knew that if I was ever going to fully commit to being vegan (and be able to keep at it) I'd have to find a way to replicate it with a vegan twist. And thus began my journey to veganize the Cheesy Gordita Crunch.

I knew the biggest challenge would be recreating the baja sauce - not only a vegan version, but the regular "these poor animals" kind so I started to research any copycat recipes on the web I could find. I finally decided on one I found on food.com which you can see here:


Baja Sauce

I was ecstatic to find that all that needed to be changed was to substitute Veganaise for the regular mayo and get moving! Then I just needed to take care of the beans, meat, cheese, lettuce, tomatoes.... Ok, it sounds like a lot - I'll just post my recipe and break it down that way.

So here you go, my vegan Cheesy Gordita Crunch (apologies ahead of time for the photos - hopefully one day I'll have a grown up camera and a kitchen with better lighting).

*Warning: these amounts are what I tend to buy when I'm thinking about making tacos in general because I'm a huge fan of using the leftovers to make taco salads, but obviously feel free to scale down to what you need*

**Note: I used Taco Bell products when possible to feel more authentic, but feel free to use whatever you prefer**

What you will need:

1 box Taco Bell Gordita shells (*I couldn't find these in my store for some reason, so we used a flatbread instead - I'm sure you can make your own, but I'm not that fancy*)
1 box hard taco shells
1 package vegan cheddar cheese shredded
1 package vegan pepperjack cheese shredded (*I used Daiya brand for both because it's my favorite and I also mixed in some mozzarella shredded Daiya because I happen to like the flavor a bit more, but it's up to you and your taste*)
1 package vegan crumble (*I used Boca vegan crumbles*)
1 package taco seasoning mix
2/3 cup water
Refried beans (*I tried to make my own for the first time ever and I'm not quite sure it was worth all the time or really tasted any better than the can variety, so it's up to you - I'll provide the refried beans recipe we used just in case*)
1 recipe baja sauce
chopped tomatoes for the topping
shredded lettuce for the topping

First things first, if you're making your own refried beans you're going to need to get them started just about first thing in the morning so make sure you plan ahead.

This is the recipe I used to make our own:

Refried Beans

The recipe says it takes about 3 hours and 45 minutes, but we put our beans on at 2:30 and there were barely ready at 10 (in fact we had to save the "re-frying" aspect of this until the next day because I like my sleep) so again, this is where canned refried beans come in handy.

Our lovely beans cooking:


 ...and 8+ hours later:


If you have a favorite refried beans recipe I say go with that. This one in general was a bit bland for my taste and I ended up adding a lot more spices into it to give it more of a kick. I'm sure if you soaked these bad boys overnight you'd have a better experience - as for me, I'm sticking to the canned from now on until someday when I'm feeling newly adventurous and less hateful towards pinto beans from scratch!

Now onto the actual cooking!

Get the baja sauce out of the way and into the fridge so the flavors can settle together!

Baja sauce:
    *1/4 red bell pepper, seeded and chopped
    *1/2 to 1 large jalapeno chopped in half (depending on how spicy you like it)
    *2 tbsp diced spanish onions
    *1 cup Veganaise or your favorite vegan mayo
    *1 tbsp vinegar
    *1/4 tsp black pepper
    *dash of cumin
    *dash of garlic powder

Get started by seeding and chopping your red bell pepper. Don't worry about being precise with the chopping since it's all headed for the food processor anyhow.

Next make sure to chop your jalapeno and dice your onions like so:


Then it's off to the food processor to puree the mixture until it's evenly mixed and smooth.

 
Mix up four tablespoons of the pepper/onion mixture with the Veganaise.

Add the rest of the spices and mix well. That's it! You're done! (Unbelievably easy, right?) And it should look something like this:


Don't be worried if it doesn't taste EXACTLY like you think it should, the flavors still need to sit. Put that sucker in the fridge and go take a nap, get a drink, watch some Saved by the Bell reruns, you know, the usual.

Start getting the rest of the food ready about half an hour before you want to eat since it all comes together pretty quickly (isn't that the beauty of tacos?).

Preheat your oven to 325.

Set up hard taco shells on an ungreased cookie sheet.

Make the taco meat by placing the package of frozen crumble into a skillet over medium high heat. You'll want to break up the crumble as much as you can.

Next add in about 2/3 the packet of taco seasoning (you can add more or less depending on your taste) and add about 2/3 cup water.

Mix thoroughly and heat until the water is completely absorbed and the crumble is heated through. This should take 10 minutes max. Feel free to add a little more water as you see fit depending again on how strong you want the flavor of the meat to be. Once done, remove from heat, cover, and set aside.


Bake hard taco shells in the oven for about 5 minutes or until crisp. Make sure to watch these so they don't burn. Remove from oven and place on a plate covered with tin foil to keep warm.

Once done, set oven to broil on low.

While the crumble is cooking and the shells are baking, shred your lettuce and chop up your tomatoes for the topping.


Mix together a cup of the pepperjack shredded cheese and a cup of the cheddar shredded cheese.

Lay out your gordita shells on a baking sheet covered with tin foil. Sprinkle generously with the pepperjack/cheddar combo.


Place the gordita shells in the oven on broil just until the cheese is melted. Be sure to watch these as you don't want them to burn or the shells to get crispy! It should only take a minute or so.


Start the assembly line!!

Place the heated hard shell on top of the soft gordita shell and push together. You may want to hold for a minute or so until the melted cheese keeps them together. (*The flatbread was a bit larger than the hard shells so I had to use a pizza cutter to make it smaller to fit*).

Add a layer of the meat, followed by the refried beans, lettuce, baja sauce, tomatoes, and finally sprinkle lightly with the leftover pepperjack/cheddar cheese combo.

TADA! You have a delicious, vegan version of the Taco Bell classic.


Verdict?

Was it exactly like the original? Not quite. But was it enough to stop my cravings for one? Hell yeah. I think using the gordita shells instead of flatbread would make a huge difference and I may scale back a bit on the jalapeno in the baja sauce next time or maybe try to add some vegan cheese to the sauce itself (like I've seen in other recipes), but all in all it was damn delicious and Seth's plate was cleared and he was up for seconds in no time.

Friday, September 23, 2011

Greetings and Salutations


So you're probably wondering who I am and why there's any need for another vegan food blog considering how many exist all over the internet (seriously - google it, you'd be surprised). To answer the first part, I'm a newly married, recently vegan, 25 year old who never thought going vegan would be possible because of the sheer delicious-ness that is cheese. 

Married life has somehow reverted this fairly independent, Wellesley woman back to the 1950s housewife stage and I seem to find myself wanting to have a home-cooked meal on the table waiting for my husband when he gets home (apron, perfectly curled hairdo, and full skirt dress optional). So this is my account of my many attempts at finding vegan food that not only satisfies, but doesn't leave me running out for that block of brie at the store. 

And as for the second part, there's absolutely no need for another vegan food blog, especially one by someone who tends to make recipes from cookbooks or online and is not at all a qualified chef. But my friends wanted me to do it, and peer pressure won out, so deal with it.

Oh yeah, and the dance part of the title: I just happen to really like dancing, but am, once again, not a professional in any way - think the sprinkler, the cowboy, and the penguin.